Basement Waterproofing Process | Royal Work Corp.
Click for the BBB Business Review of this Waterproofing Contractors in Mississauga ON” style= Royal Work Corp. Waterproofing Toronto Reviews
CALL FOR A FREE ESTIMATE (416) 837-1077
REQUEST A QUOTE

How We Do It

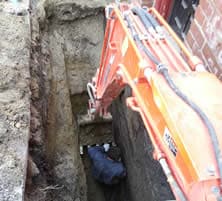
Small Excavator in the Trench
1

Excavation Initiates the Waterproofing Process

Excavation, or the removal of soil and clay, through a combination of machine and hand digging will provide access to your foundation and start the waterproofing process. We dig a trench 25-30 inches wide that extends down to the footing. This will allow us sufficient room to work and properly inspect the foundation and footer. After excavation, we use a wire brush and power-washer to clean the wall and remove any loose debris.
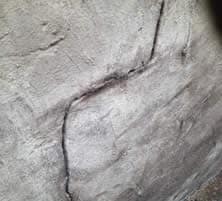
Crack in foundation
2

Foundation Wall Examination & Crack Repair

Once the wall is exposed, cleaned and dried, we do a thorough examination to locate cracks and holes. Each is cleared of debris with an angle grinder or diamond-bit crack chaser for better adhesion. They are then sealed, with hydraulic cement for poured walls or ElastiPoxy-sand mix for block walls, to restore the structural integrity of the wall and prevent any further water infiltration. All repairs are troweled to a smooth finish and allowed to harden for several hours.
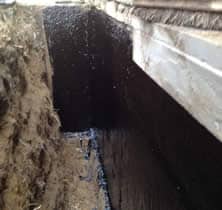
Black Liquid Membrane
3

Apply First Coat of Bakor Aqua-Bloc

The next, and critical, step in the process is to apply a coat of Bakor Aqua Bloc liquid membrane. It is designed for both poured and block foundation walls and has proven to be the most cost effective and efficient method of basement waterproofing. It replaces tar and Polymer-based products, as they only provide damp-proofing and degrade when exposed to soil pH. Aqua Bloc is a rubberized asphalt that is applied with a trowel to every inch of the foundation. It bridges cracks and holes for superior protection against water infiltration.
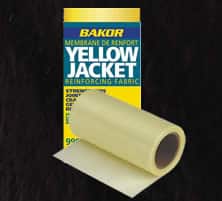
Yellow Roll
4

Apply Bakor Yellow Jacket on Aqua-Bloc

The liquid membrane is then covered with an open weave glass fabric, manufactured by Bakor, called Yellow Jacket. Synthetic resins saturate glass fibre yarn to protect against mildew, rotting and water wicking into the coating material. The mesh is completely embedded into the Aqua Bloc to hold it in place and seal cracks and gaps. The yellow color helps reveal exposed areas during application, especially in poor lighting conditions.
Black Liquid Membrane
5

Apply Second Coat of Bakor Aqua-Bloc

A second coat of Bakor Aqua Bloc liquid membrane is applied over the Yellow Jacket. It is completely embedded into the mesh and shields the foundation even further from water infiltration.
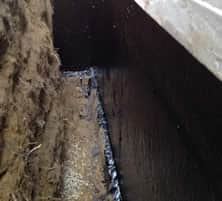
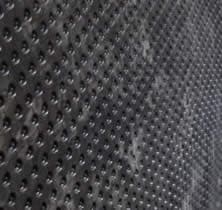
Black Membrane
6

Installation of Platon Membrane and Moulding Strips

At this stage, one last water barrier is installed – the Platon or drainage board membrane. This is a durable, dimpled high-density polyethylene material that provides a space between the walls and wet soil from the back-filled excavation area. The dimpling is installed toward the wall to provide an air space which allows any water to drain away from the foundation and directly to the weeping tile. Moulding strips along the top of the membrane help affix it to the wall and provide a tight seal. Any other seams are sealed with caulking.
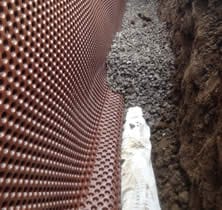
Gravel and white pipe
7

Installation of New Weeping Tile with Filter

In order to provide a place for the water to go, new weeping tile will need to be installed. Current technologies have created stronger, more efficient materials for weeping tile. We’ll install a perforated plastic style that is covered with a filter sock to prevent sand and debris from clogging the tile. Gravel is placed around the tile for protection and improved drainage. Then, 10 inches of gravel is installed with a filter fabric on top to prevent silting and increase the life expectancy of the system.
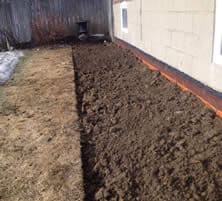
Soil around foundation
8

Back-filling and Grading

The final step in the basement waterproofing process requires back-filling or pushing the dirt back into the excavated area. A compactor is used to tamp the earth tightly to the foundation. Care must be used to avoid damaging underground utilities and gas lines. A layer of topsoil will complete the project with the finish grade being sloped away from the house.

As you can see, the work involved in performing a permanent waterproofing solution is quite involved and time-consuming. There is no better reward for hard work than a successful conclusion – a dry, completely protected basement. We’re fully licensed and insured, use only quality products and provide a transferable, 25-year warranty.

Now that you understand our proven basement waterproofing process better, perhaps you’re ready to take the next step toward enjoying a healthy and dry basement. Call Royal Work Waterproofing or simply fill out our contact form for your no-obligation estimate today.

BLOG & INDUSTRY NEWS

08
Mar
Residential Waterproofing Systems in Toronto: How to Protect Your Home from Damage If you live in the Greater Toronto Area, the threat of basement flooding is not [...]
30
Jan
Basement Flooding in Toronto: Causes and How To Safeguard Your Home From Its Effects Basement flooding is an unpleasant reality for many homeowners in Toronto. Heavy rains, overflowing sewers, [...]
29
Dec
Basement Seepage Problems after Heavy Rain in Toronto Ontario A Comprehensive Guide To Leaky Walls or Basement Seepage in Toronto, Ontario If you have [...]
View All
Save up to $500 on Your Waterproofing Project With Royal Work Corp. Waterproofing Save $100 on Sump Pump and Backwater Valve Installation Senior Discount of 10% On Every Waterproofing Project
Real Time Web Analytics